I will show you How To Install Minecraft PE Shaders for iOS! This is the best tutorial if you are looking for shaders. Shaders are absolutely the best thing to have in the game. It is absolutely amazing to play the game with this. Please, follow my steps so you can easily get these shaderpacks!
How To Install Shaders in Minecraft PE for iOS
As you might already know, you can find many formats of shaders in the game. Well, don’t worry I will explain what to do with every format. You can find formats like .MCPack, .MCWorld, .RAR and .ZIP. Each format is being installed differnetly. First of all, you should go to my shaders section on my website. There are many shaders, just choose the one you want to install.
.MCPack
When you download a shader and it is in .mcpack, you’ve already won the lottery. First thing to do is to go to the files app and “Downlaods”. In there, you will find your new shader in .mcpack format. Simply click on that and select “Minecraft”. This will automatically take you to the game and in there, you need to go to the global resources. Find the shader and hit activate. That’s it! You can easily enjoy the shaders in mcpe ios now.
.ZIP and .RAR
This is where things get little too complicated. But I’ll show you what to do. For this, you will need Files app updated.
1. Update Files in App Store.
2. Open the Files app and go to the “Downloads”.
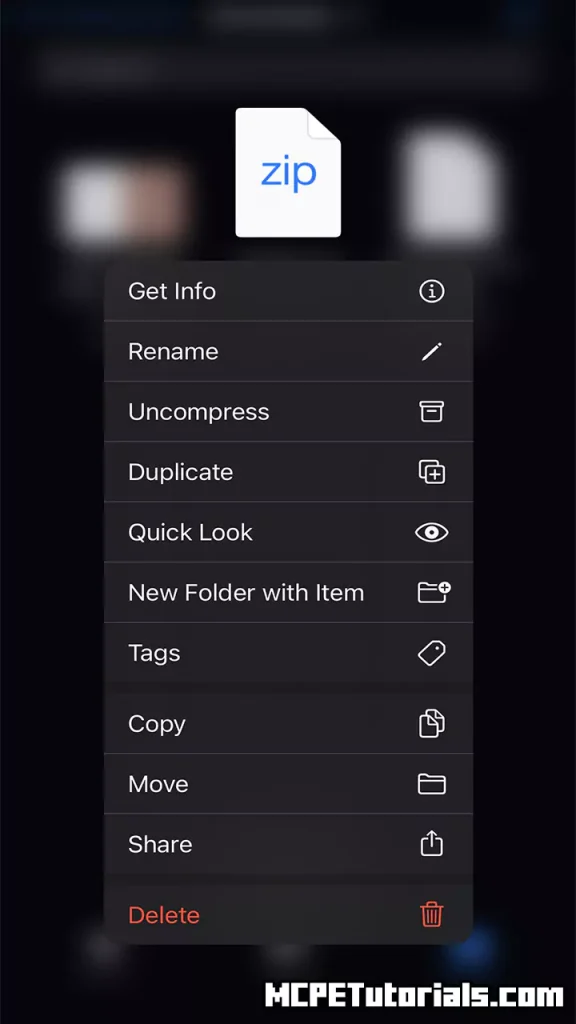
3. Find your shader and hold your finger on it. Select “Rename”.

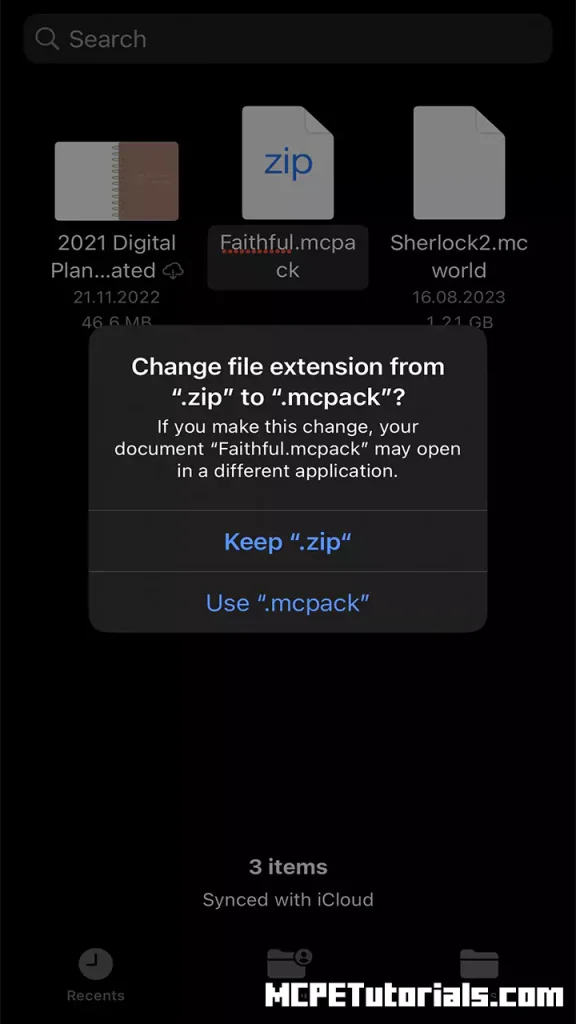
4. Make sure you rename it with this template: “shadersname.mcpack” I’m using Evo Shader so I will have “Evo_Shader.mcpack”.
5. It will ask you to change the file extension, hit “Use .mcpack”.

6. Click on the file now and it will take you to the game!
7. Go to global resources and activate it, enjoy the shader!
Conclusion
Thank you so much for reading How To Install Shaders in Minecraft PE for iOS! Enjoy this tutorial, it is definitely not that hard to install. If this is still not working for you, contact me and I will help you out.


